
Morning Friends! It seems like Spring is here to stay and I have such a bad case of Spring fever. We spent most of this weekend outside - cleaning, staining our front porch, and putting up our twinkly backyard string lights.
The beautiful weekend we just had also meant that we were already able to get our annual herb garden planted, set up all the patio furniture, and even enjoyed it with friends!
Yay! We're officially ready for outdoor party season!
I can barely wait for even warmer days + for everything to start blooming and to start enjoying the outdoors. I suppose until then I'll be sticking to pretty blooms and luscious colors in my studio!
Yay! We're officially ready for outdoor party season!
I can barely wait for even warmer days + for everything to start blooming and to start enjoying the outdoors. I suppose until then I'll be sticking to pretty blooms and luscious colors in my studio!

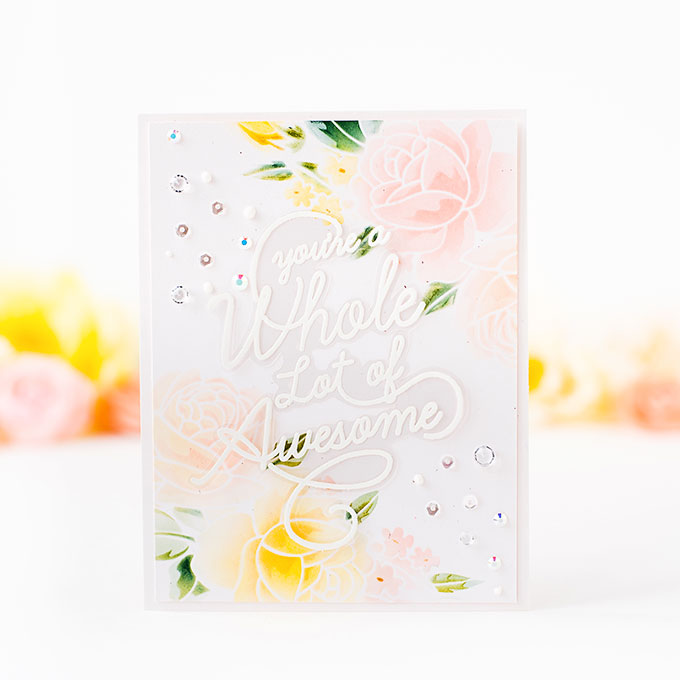
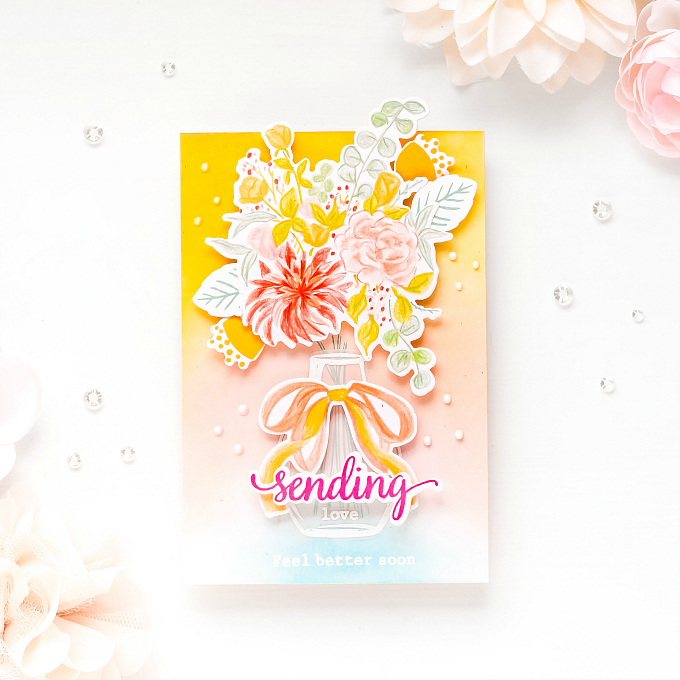
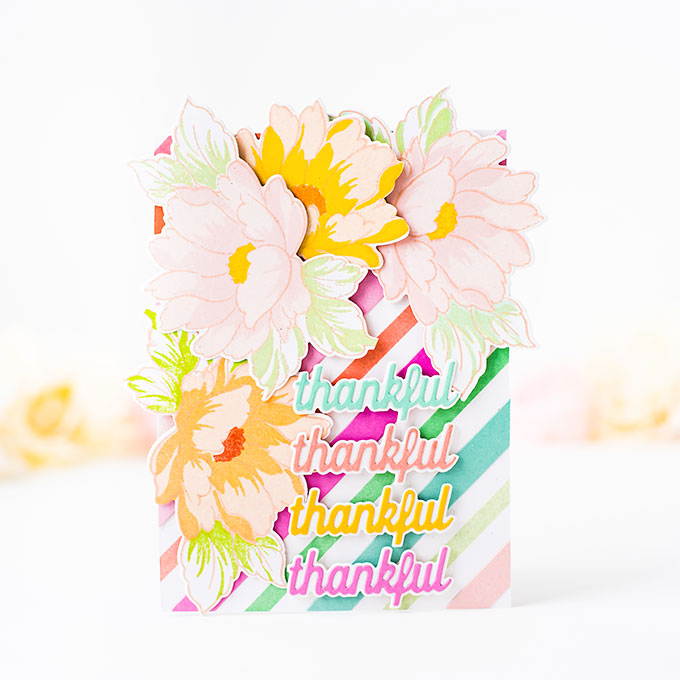
For this card, I used PTI's Peonies on Parade stamp set, embossed in various colors (Ranger Rose Quartz, Ranger Tea Rose, Ranger Fern Green). I used simple watercolors to work in a bit of pigment, which I then lightened with a waterbrush. I repeated the same technique for the border, which I stamped with WPlus9's Quilt Prints stamp, embossed in white. For ideas on how to do a lighter color wash with this stamp click here. I created the two-tone look by keeping the outer bits saturated with color, while diluting the color for the centers.

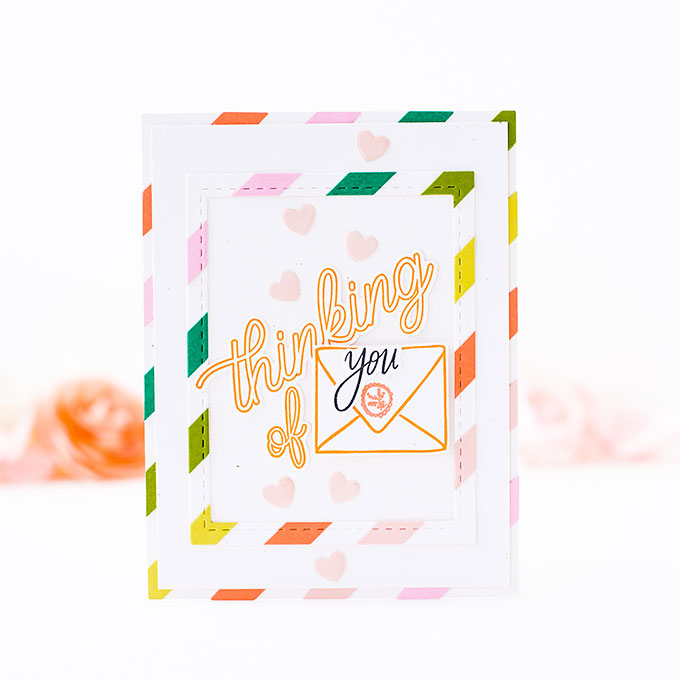
My favorite part of this card is this new ribbon design that I haven't been able to stop creating in batches. It's just so fun + easy to do!
I absolutely love the striped look.
To crate a ribbon like this, I recommend using a waterbrush that is filled with water and a few drops of your favorite water-based dye ink (I used Papertrey Ink re-inkers). The constant flow of colored water is what is needed to create this continuous line. I haven't tried this method with a regular brush + watercolor, but I think the constant dipping back and forth would create a line that is slightly more blotchy - which would wouldn't look quite like this ribbon, but would probably also be a great look!
The key to getting a soft line like this is:
1. Instead of moving your brush, keep your brush in one spot and pull the ribbon through so that you are continually applying even pressure; and
2. Ensure that your brush is 1/4 the size of the width of your ribbon and that you do not press down too hard, as the color will bleed and may end up coloring your entire ribbon!

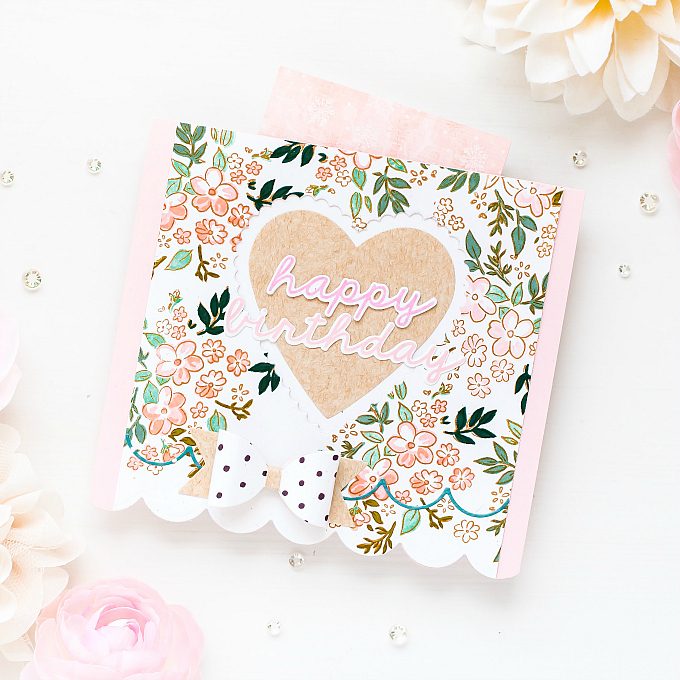
To finish off this card, I stamped a stitched border around the card + added a bitty little heart to the top. The diecut sentiment is from Echo Park Designer Dies - a new favorite for me.

Are you getting Spring fever like me?
Do you have any green thumb plans or projects in the works?
Let me know in the comments what your favorite things about Spring are! And as always, if you have any questions about the tutorial, I'm happy to help! Hope you'll give it a try!
Happy Spring friends.
Ivana


Such a great idea; to add a strip of color to your ribbon!
ReplyDeleteLooks so pretty. And I like the die cut pieces too : )
Karen
I like the soft delicate look this has, so romantic!
ReplyDeleteAnother stunner my friend <3 Can´t wait to see more so please do not stop to amaze me !!! xoxo
ReplyDelete